
Create Route 53 record for load balancer on Amazon
So you have few instances attached to a load balancer on Amazon and want to create a Route 53 entry for it to use the Name Server(NS) entries instead of the load balancer long A record which is not accepted by A record in domains DNS managers.
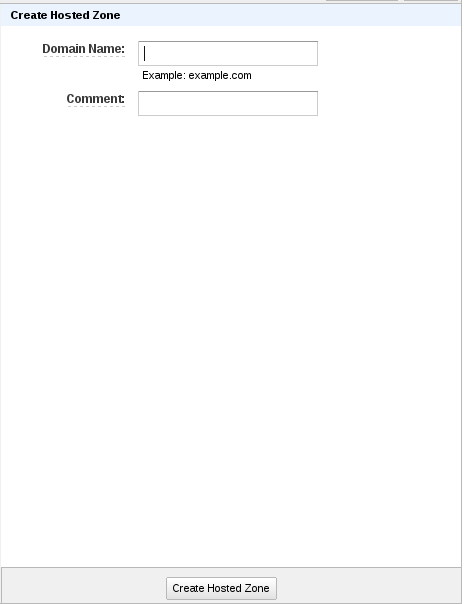
Login to your AWS console area and click on Route 53 from the services dropdown menu. Click on the Create Hosted Zone button. Input your domain or sub domain name in the Domain Name field and save the entry by clicking Create Hosted Zone button.
Once created, click on Go to Record Sets. And there you will see two records are created by default SOA(Start of authority) and NS(Name Servers).
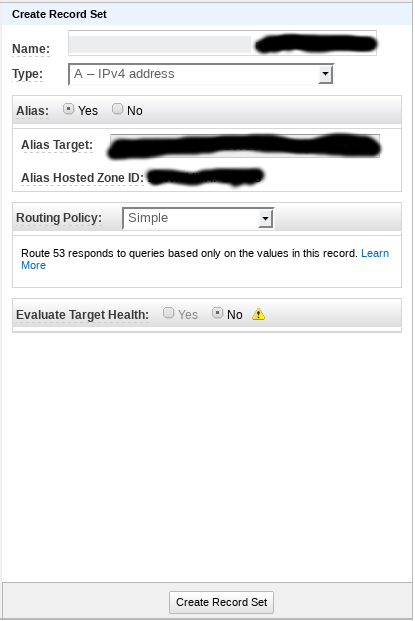
Now click on the Create Record Set button and leave the Name field as it is. Select A record from the Type drop down. Select Yes from the Alias tab and choose the load balancer you want to attach and save the record. Now you have three records, SOA, NS and A record.
Next copy the NS records and add them in the NS section of your domain. If you have added any CNAME for load balancer, you can safely remove that. Wait for the DNS propagation and check back your site later. You can use dig command in terminal to get the information about the domain.
In the next article i will show you how to add TXT(SPF and DKIM) records for a sub domain in route53. Stay tune.
Update (20-03-2013): Check out this article for how to configure/add SPF and DKIM