
Setting up Microsoft exchange server mailbox with Thunderbird
Setting up Thunderbird with Microsoft exchange server is little different than normal mail setup. This post focuses on setting up mail which have no access with POP and IMAP from Microsoft exchange server.
That is quite easy if you have IMAP or POP support on exchange server, but this how to will cover more than that. Lets assume that you do not have support for both IMAP and POP.
1st of all lets list down the softwares which will be used for this how to:
Java 1.5 or above
Thunderbird 12.0
Davmail 3.9.8
Microsoft Exchange Server 2003 or later.
Extensions [Lightning]
I assume you have already installed Java, if not you can install it from YaST. Oh yeah this post will be based on openSUSE 12.1 KDE.
Next install Thunderbird from YaST again, if not installed yet.
Setup Davmail:
Now time to download Davmail, download it from here. I have downloaded 3.9.8 version.
Choose Linux(others) from the list and select your system arch(32 or 64bit).
Extract it with an extracting app you have, and put the extracted directory any where you like, e.g: home folder. Enter to the directory and click on davmail.sh. A notification pop up will appear.
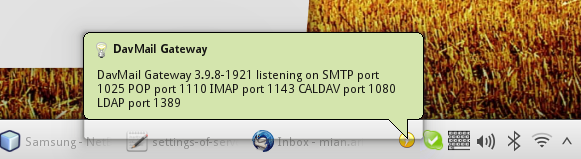
There are not much things to change in the settings(right click on the icon in the notification area) except OWA URL, it can be like, https://domian.com/exchange/. Change domain.com to your exchange server domain.
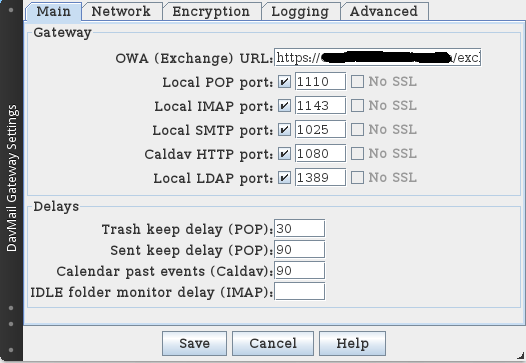
All other default ports settings are good to go.
There are logs available if you want to check it out, right click and show logs.
Now for Thunderbird mail setup we will cover three areas to configure, configure exchange mail, calendar and directory service.
Section-I (configure mail)
1- Open Thunderbird and from menu > File > New > Existing mail account.
2- Window will appear to enter your name, email and password. Enter your full email address.
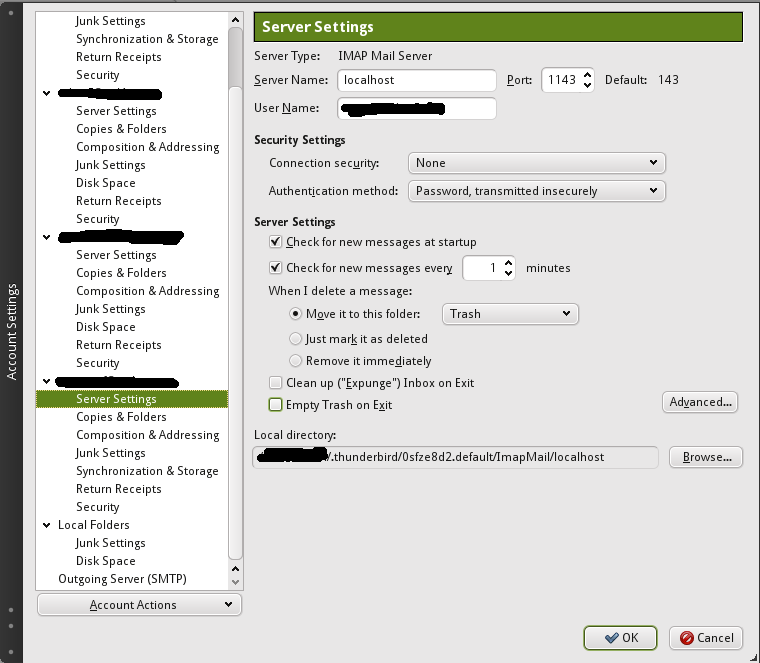
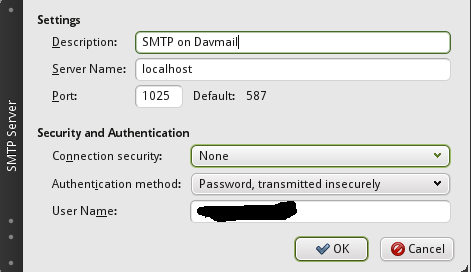
3- Change the rest of the settings according to the image below and re-test. Remember to check the ports from Davmail settings to reflect yours.
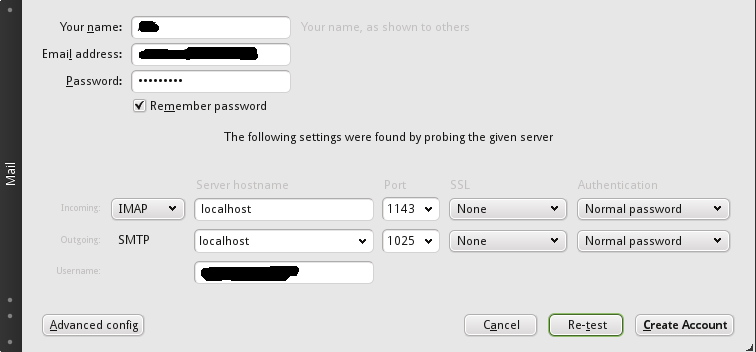
Note: Username will be like domainuser.
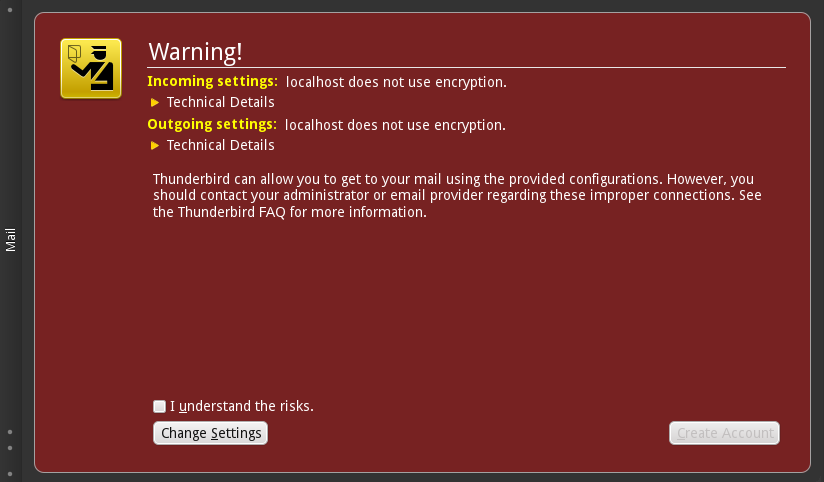
4- If step 3 is successfully done, you will see this page. Check it anyway and click create account because we are running it on localhost, so no worries.
5- Done.
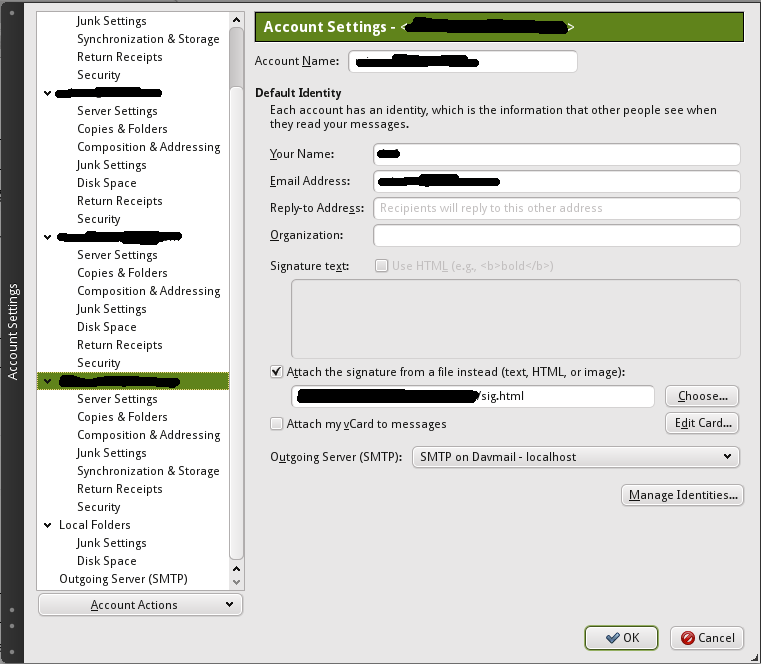
6- You can change some of the settings from Edit > Account settings, by following the images below, but that’s totally up to you.
Section-II (configure calendar)
1- Install lightning addon from the addon page, tools > add-ons. Restart Thunderbird after installation.
2- Add new calendar from File > New > Calendar.
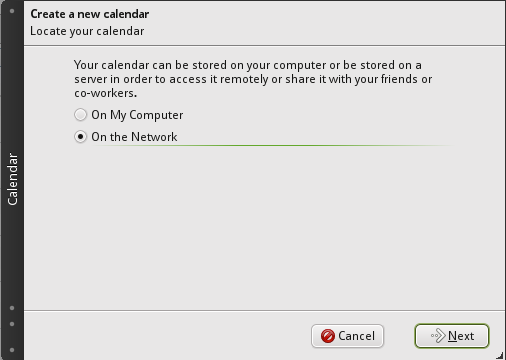
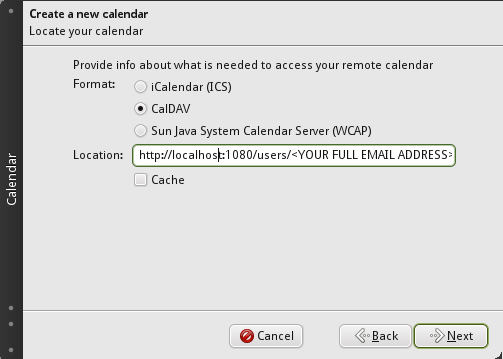
3- Use this URL: http://localhost:1080/users/YOUR_FULL_EMAIL_ADDRESS/calendar. Choose the appropriate options as shown. Change
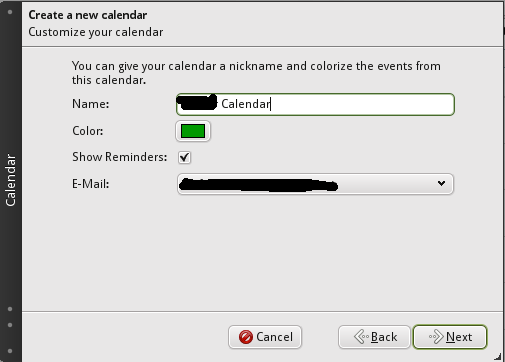
4- In this window, name your calendar and choose any color you like, remember to not leave the E-mail drop down blank, choose your email address. If you leave it blank, no invitations will be sent to other users.
5- Done
6- In the sidebar a mini calendar will appear, by clicking on the calendar icon at the top will open a new tab.
Section-III (configure directory service)
1- Open Address book and add new LDAP from File > New > LDAP Directory.
2- Enter the information asked for name, hostname, base dn, port number and bind dn.
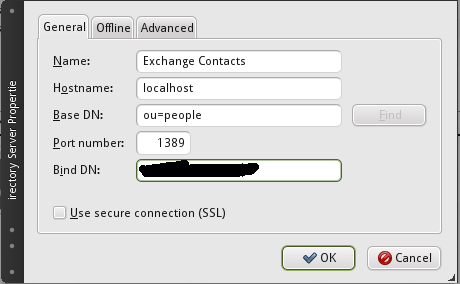
Note: Bind DN is the username domainuser.
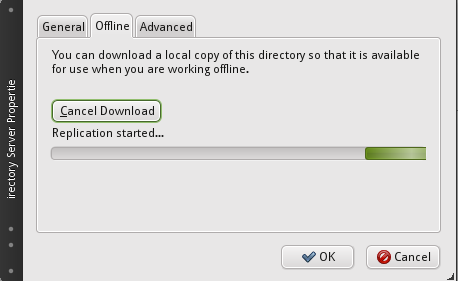
3- Download your directory from the offline tab, if you want.
4- Done
Everything is configured, and now what you can do is Wait. It will depend on your internet connection and total emails with attachments. It will take some time, so be patient.
If you want to use personal address book, you will need SOGo connector extension. But as it is not compatible with 12.0, so i can’t help with that. You can give it a try here, and then follow this link for how to configure it.
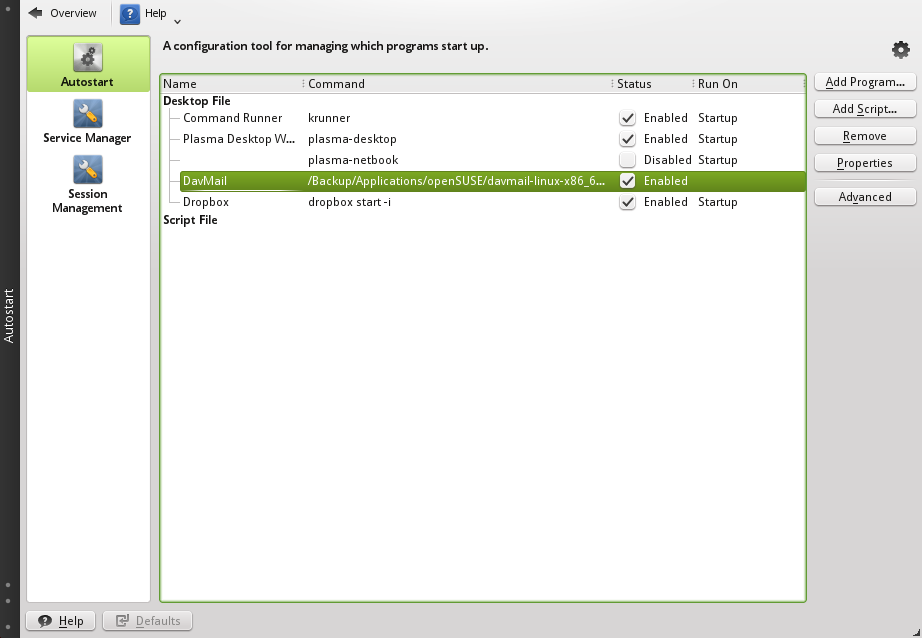
On each boot of the system, Davmail will not start automatically. I found out this way for KDE, which is quite easy. For other desktops and desktops, please search for the way around.
Open configure desktop > Startup and Shutdown > Autostart. Click on Add Program button, and locate davmail.sh where you saved it after extraction. Check Enabled checkbox. Davmail will now start on each boot.
Note: If you discover that there are 2 mails in the sent folder, to avoid this go to Davmail settings and in the advanced Tab uncheck ‘SMTP save in sent’.
References:
- https://getsatisfaction.com/mozilla_messaging/topics/thunderbird_owa_support
- http://davmail.sourceforge.net/faq.html
- http://davmail.sourceforge.net/linuxsetup.html